一月中旬把手机升级到 Android 11 以后,无法忍受 QQ 下载的文件不能正常读取的问题(Android 11 不允许普通应用读取 /sdcard/Android/data,而 QQ 把下载的文件放在这里),于是决定将手机 root。
正好赶上需要对应用加钩子注入的项目,root 机在手,于是来学一学 Xposed 模块的开发,做几个有意思的模块来玩玩,顺便在此做个记录。
本文迁移自旧博客,文章写就时我算是刚刚接触 Xposed 开发,内容难免有纰漏错误之处,作为一份自己学习成长中珍贵的记录,所有错误之处均未作修改,只是在下方添加了简单批注
玩机这么长时间,却一直没有找到一款合适的 Android 平台浏览器,你可能在一些网站上看到过 Quark、Via 或者 Chrome、Firefox 等浏览器的相关推荐,但就使用体验来看,它们的功能都有一定缺陷,下表中展示了我用过的一些浏览器:
| 浏览器 |
存在问题 |
| QQ 浏览器、百度浏览器 |
首屏广告和不断的推送令人难以忍受 🤮 |
| 系统自带 |
同样存在推送,且不支持插件 |
| Via、Soul 等「轻量级」浏览器 |
标签页开多了非常卡,插件系统不够完善 |
| Quark |
JavaScript 引擎性能不行(貌似),而且越做越臃肿,不支持自定义插件 |
| Chrome、Kiwi、Firefox |
打开外部应用之前不询问 |
这样看来,改造 Kiwi / Chrome 系浏览器似乎是一种最容易实现的优化方式了,监控其打开外部应用的行为,在必要时给予询问或阻止,就能够将其改造成各方面功能都非常强大的 Android 平台浏览器。
准备工作
新建工程
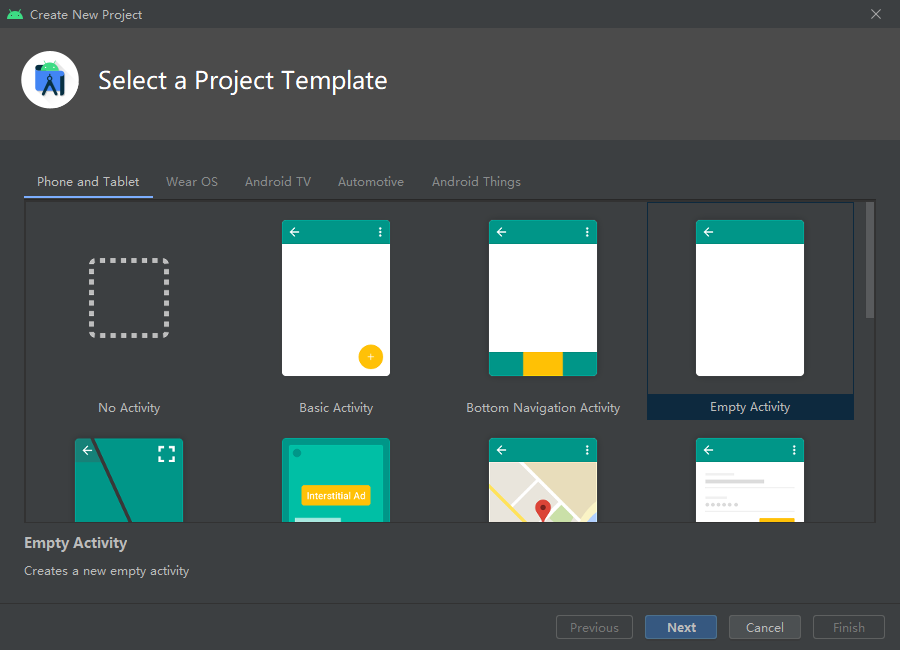
我选择在 Android Studio 上进行模块开发,首先新建一个工程,由于我们的模块不需要界面,所以选择 Empty Activity 或者 No Activity,然后下一步,设置好 SDK 版本和应用包名,确定,等待工程创建完成
如果 Gradle 一直不能成功下载,可以尝试更换国内源或者手动下载依赖的 zip 包
注:如果 Gradle 一直不能成功下载,换个好点的梯子就行了
环境配置
在左上角切换到 Project 视图,打开 app/build.gradle,按照下图添加配置,然后重新同步:

注:并不需要添加 :api:sources,一个 :api 即可
然后在菜单选择 Run => Edit Configurations…,在打开的界面中将右上角 Allow parallel run 的勾取消。
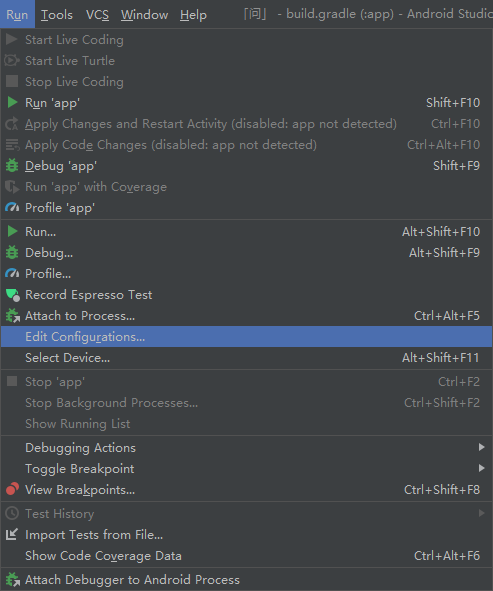
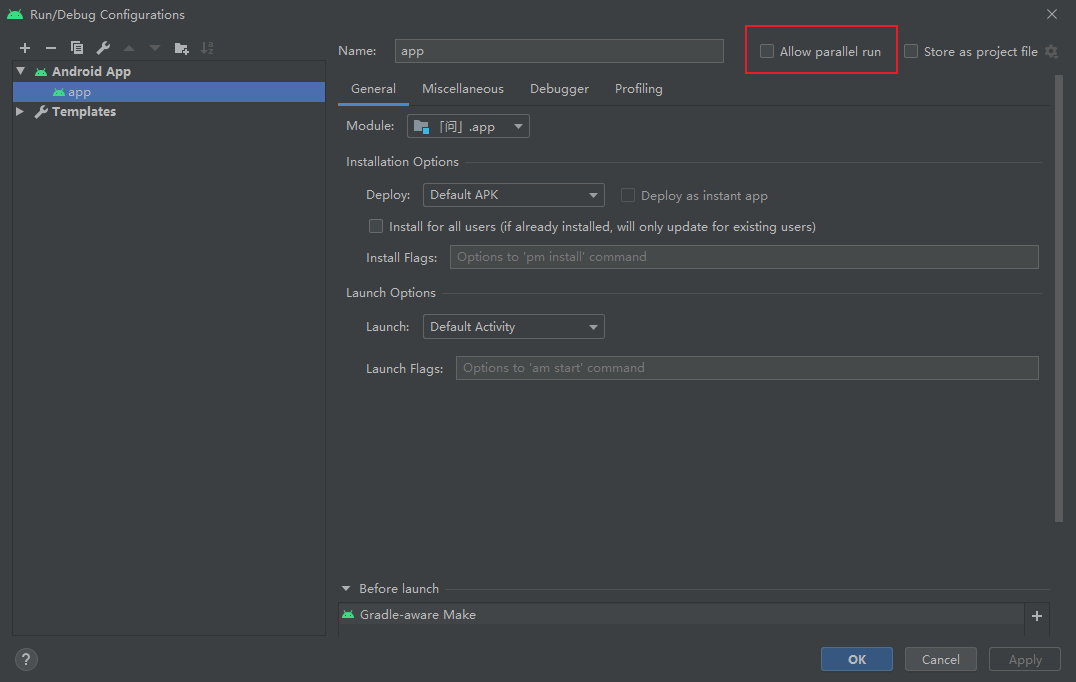
注:这个是否勾选没有影响,在新版 Android Studio 中倒是要勾选 Always install with package manager
最后点击 OK 保存退出即可。
模块编写
完善模块信息
环境配置完成之后,打开 AndroidManifest.xml,添加 3 个 meta-data 标签,修改后的文件如下:
1
2
3
4
5
6
7
8
9
10
11
12
13
14
15
16
17
18
19
20
21
22
23
24
25
26
27
| <?xml version="1.0" encoding="utf-8"?>
<manifest xmlns:android="http://schemas.android.com/apk/res/android"
package="mufanc.edxp.kiwi">
<application
android:allowBackup="false"
android:icon="@mipmap/ic_launcher"
android:label="@string/app_name"
android:roundIcon="@mipmap/ic_launcher_round"
android:supportsRtl="true"
android:theme="@style/Theme.问"
android:fullBackupContent="@xml/backup_descriptor">
<meta-data android:name="xposedmodule" android:value="true" />
<meta-data android:name="xposeddescription" android:value="打开其他应用前先询问" />
<meta-data android:name="xposedminversion" android:value="82" />
<activity android:name=".MainActivity">
<intent-filter>
<action android:name="android.intent.action.MAIN" />
<category android:name="android.intent.category.LAUNCHER" />
</intent-filter>
</activity>
</application>
</manifest>
|
| 字段名 |
含义 |
| xposedmodule |
表示这是一个 Xposed 模块 |
| xposeddescription |
模块的描述信息 |
| xposedminversion |
支持的最小 Xposed API 版本 |
注:如果使用 LSPosed,建议增加一项 xposedscope 指定作用域
如果现在就想编译测试,还需要先执行下面这步配置
设定挂钩逻辑
接下来开始编写代码,在 MainActivity.java 同级目录下创建一个 IntentHook 类(类名可以随便定),并实现 IXposedHookLoadPackage 接口(相关 import 已省略):
1
2
3
4
5
6
7
8
| public class IntentHook implements IXposedHookLoadPackage {
private static final String targetPackageName = "com.kiwibrowser.browser";
@Override
public void handleLoadPackage(XC_LoadPackage.LoadPackageParam lpparam) throws Throwable {
}
}
|
在这个方法中,我们可以自定义 Xposed 对各个 APP 的挂钩逻辑,我这里使用 findAndHookMethod 来抓取跳转到其它 Activity 的方法,关于更多 API 的使用,可以参考官方文档中给出的说明和示例:
1
2
3
4
5
6
7
8
9
10
11
12
13
14
15
16
17
18
19
20
21
22
23
24
25
26
27
28
29
30
31
32
| XposedHelpers.findAndHookMethod(
"android.app.IActivityTaskManager$Stub$Proxy",
lpparam.classLoader,
"startActivity",
XposedHelpers.findClass("android.app.IApplicationThread", lpparam.classLoader),
String.class,
String.class,
Intent.class,
String.class,
android.os.IBinder.class,
String.class,
int.class,
int.class,
XposedHelpers.findClass("android.app.ProfilerInfo", lpparam.classLoader),
android.os.Bundle.class,
new XC_MethodHook() {
@Override
@SuppressLint("QueryPermissionsNeeded")
protected void beforeHookedMethod(MethodHookParam param) throws Throwable {
Intent intent = (Intent) param.args[3];
ComponentName componentName = intent.resolveActivity(activity[0].getPackageManager());
if (componentName != null && !componentName.getPackageName().equals(targetPackageName)) {
Log.i("KiwiLogcat", "Calling package: " + componentName.getPackageName());
Log.i("KiwiLogcat", "Intent: " + intent.toUri(0));
param.setResult(0);
}
}
}
);
|
这里设置的逻辑是输出 Intent 相关信息,然后默认拦截,并没有达到我们想要的「询问」效果,所以还要进行进一步的处理,这里先放一放,后续再来完善。
创建资源文件
接下来设定弹窗样式,首先找来一张点九图,标注好四个拉伸范围后放在 res/drawable-nodpi 目录下:
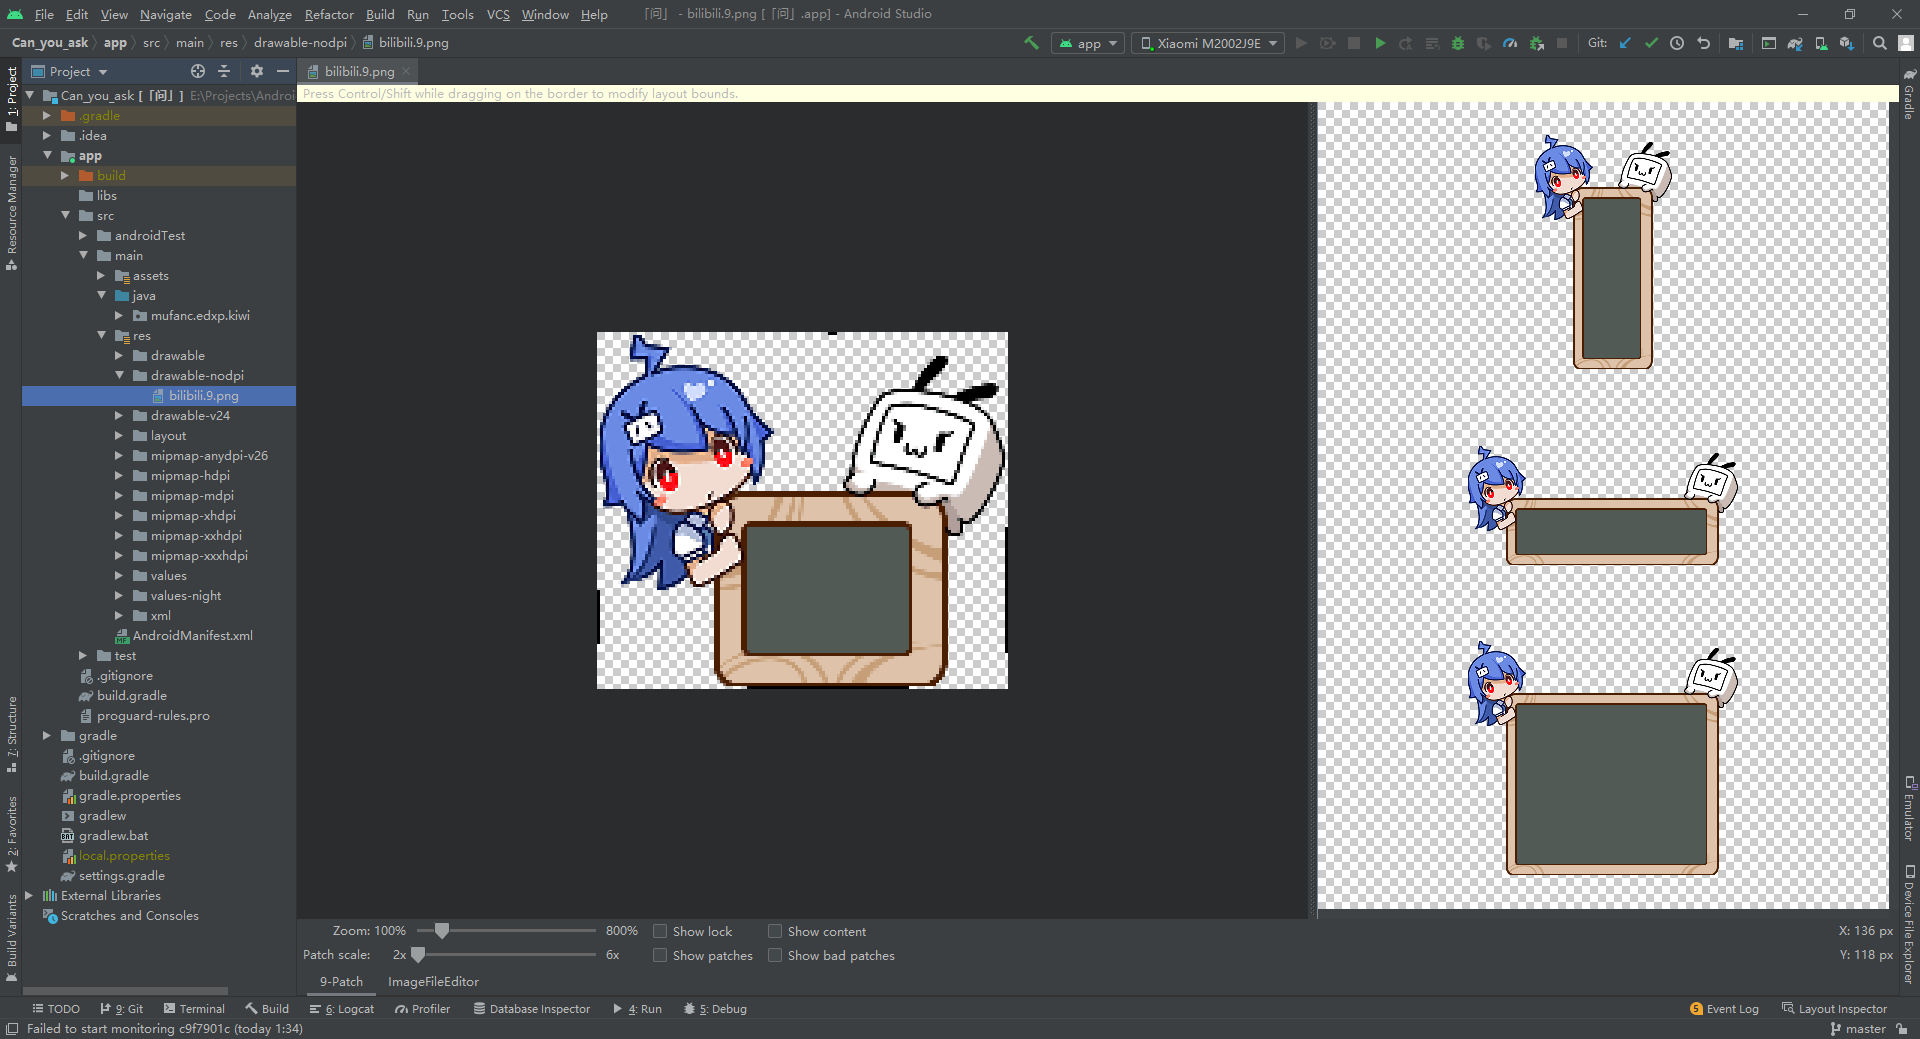
点九图是一种可拉伸的位图,可用作视图的背景,Android 会自动调整图形的大小以适应视图的内容(效果见上图),常见的应用如 QQ 聊天气泡就是点九图的一个经典应用案例。
接下来实现一个 Sample,编写布局文件,然后在 MainActivity 中引用:
activity_main.xml1
2
3
4
5
6
7
8
9
10
11
12
13
14
15
16
17
18
19
20
21
22
23
24
25
26
27
28
29
30
31
| <?xml version="1.0" encoding="utf-8"?>
<androidx.constraintlayout.widget.ConstraintLayout
xmlns:android="http://schemas.android.com/apk/res/android"
xmlns:tools="http://schemas.android.com/tools"
android:layout_width="match_parent"
android:layout_height="match_parent"
tools:context=".MainActivity">
<LinearLayout
android:layout_width="match_parent"
android:layout_height="match_parent"
android:orientation="vertical"
android:gravity="center">
<LinearLayout
android:background="@drawable/bilibili"
android:layout_width="wrap_content"
android:layout_height="wrap_content"
tools:ignore="UselessParent"
android:gravity="center">
<TextView
android:layout_width="wrap_content"
android:layout_height="wrap_content"
android:layout_margin="5dp"
android:textColor="@color/white"
android:textSize="20sp"
android:text="@string/produced_by_mufanc" />
</LinearLayout>
</LinearLayout>
</androidx.constraintlayout.widget.ConstraintLayout>
|
MainActivity.java1
2
3
4
5
6
7
8
9
10
11
12
13
14
| package mufanc.edxp.kiwi;
import androidx.appcompat.app.AppCompatActivity;
import android.os.Bundle;
public class MainActivity extends AppCompatActivity {
@Override
protected void onCreate(Bundle savedInstanceState) {
super.onCreate(savedInstanceState);
setContentView(R.layout.activity_main);
}
}
|
或使用另一种动态加载控件的方式:
MainActivity.java1
2
3
4
5
6
7
8
9
10
11
12
13
14
15
16
17
18
19
20
| package mufanc.edxp.kiwi;
import androidx.appcompat.app.AppCompatActivity;
import android.os.Bundle;
import android.view.LayoutInflater;
import android.view.ViewGroup;
public class MainActivity extends AppCompatActivity {
@Override
protected void onCreate(Bundle savedInstanceState) {
super.onCreate(savedInstanceState);
LayoutInflater.from(this).inflate(
R.layout.activity_main,
(ViewGroup) getWindow().getDecorView()
);
}
}
|
编译、打包、安装,打开后效果如下:

注:这个 padding 和字号放到现在就要掀桌了(
加载资源文件
Xposed 注入之后,我们写的这些代码实际上是以目标应用的身份运行的,所以不能采用传统的资源加载方式(比如使用 R 类来定位资源)来加载模块中的资源文件。
Xposed API 中提供了资源钩子相关的函数,但在测试过程中发现资源钩子并没有生效 (或者说我没写对?) ,同时开启资源钩子也将带来一系列问题,譬如与系统主题选项冲突,截图不能正常工作(截出来是裂图)等,所以采用资源钩子也不是一项非常明智的选择。
注:资源钩子并没有什么问题,或许是 EdXposed 太烂🤔
好在 Android 提供了一种方式让我们能够动态地从一个 apk 文件中加载所需要的资源 —— 资源管理器,使用示例如下:
1
2
3
4
5
6
7
8
9
10
11
12
13
14
15
16
17
18
19
20
21
22
23
24
25
26
27
28
29
30
31
32
33
34
35
36
37
38
39
40
41
42
43
44
45
46
47
48
49
50
| public class IntentHook implements IXposedHookZygoteInit, IXposedHookLoadPackage {
private static String modulePath;
private Drawable background = null;
@Override
public void initZygote(StartupParam startupParam) throws Throwable {
modulePath = startupParam.modulePath;
}
@Override
public void handleLoadPackage(XC_LoadPackage.LoadPackageParam lpparam) throws Throwable {
.........
}
private void loadResources(Application application) {
if (background != null) {
return;
}
try {
@SuppressLint("PrivateApi")
Class<?> apkAssetsClass = Class.forName("android.content.res.ApkAssets");
Method loadFromPath = apkAssetsClass.getMethod("loadFromPath", String.class);
Object apkAssets = loadFromPath.invoke(null, modulePath);
AssetManager assets = AssetManager.class.newInstance();
Method setApkAssets = assets.getClass().getDeclaredMethod(
"setApkAssets",
Array.newInstance(apkAssetsClass, 0).getClass(),
boolean.class
);
Object assetsArray = Array.newInstance(apkAssetsClass, 1);
Array.set(assetsArray, 0, apkAssets);
setApkAssets.invoke(assets, assetsArray, false);
Resources resources = new Resources(
assets,
application.getResources().getDisplayMetrics(),
application.getResources().getConfiguration()
);
PackageInfo packageInfo = application.getPackageManager().getPackageArchiveInfo(modulePath, PackageManager.GET_ACTIVITIES);
Log.i("KiwiLogcat", "Loading resources from: " + packageInfo.packageName);
int backgroundImageID = resources.getIdentifier("bilibili", "drawable", packageInfo.packageName);
background = ResourcesCompat.getDrawable(resources, backgroundImageID, null);
} catch (Exception err) {
Log.e("KiwiLogcat", "Error occurred while loading resources:", err);
}
}
}
|
注:有没有一种可能,我们有 XModuleResources
手搓控件布局
本想直接读取 apk 中的布局 xml 的,结果在应用时因为不明原因失败了 (难道又是我没写对?以后再试试),只能用代码将弹出框的布局一点一点写出来。新建一个 PopupView 类,继承 android.widget.PopupWindow,然后定义构造方法,传入 Activity 上下文、背景图、目标应用包名和 Intent 对象,生成一个弹出窗口:
1
2
3
4
5
6
7
8
9
10
11
12
13
14
15
16
17
18
19
20
21
22
23
24
25
26
27
28
29
30
31
32
33
34
35
36
37
38
39
40
41
42
43
44
45
46
47
48
49
50
51
52
53
54
55
56
57
58
59
60
61
62
63
64
65
66
67
68
69
70
71
72
73
74
75
76
77
78
79
80
81
82
83
84
85
86
87
88
89
90
91
92
93
94
95
96
97
98
99
100
101
102
103
104
105
106
107
108
109
110
111
112
113
114
115
116
117
118
119
120
121
122
123
124
125
126
127
128
129
130
| package mufanc.edxp.kiwi;
import android.annotation.SuppressLint;
import android.content.Context;
import android.content.Intent;
import android.content.pm.PackageManager;
import android.graphics.Color;
import android.graphics.drawable.Drawable;
import android.util.DisplayMetrics;
import android.view.Gravity;
import android.view.View;
import android.view.ViewGroup;
import android.view.WindowManager;
import android.widget.FrameLayout;
import android.widget.LinearLayout;
import android.widget.PopupWindow;
import android.widget.TextView;
import de.robv.android.xposed.XposedHelpers;
public class PopupView extends PopupWindow {
@SuppressLint("SetTextI18n")
public PopupView(Context context, Drawable background, String packageName, Intent intent) {
super(ViewGroup.LayoutParams.MATCH_PARENT, ViewGroup.LayoutParams.MATCH_PARENT);
LinearLayout frame = new LinearLayout(context);
frame.setGravity(Gravity.CENTER);
LinearLayout linearLayout = new LinearLayout(context);
linearLayout.setOrientation(LinearLayout.VERTICAL);
TextView hint = new TextView(context);
hint.setText("网页请求打开" + getNameByPackage(context, packageName) + ",是否允许?");
hint.setTextSize(16);
hint.setTextColor(Color.WHITE);
hint.setGravity(Gravity.CENTER);
hint.setPadding(5, 15, 5, 5);
linearLayout.addView(hint);
LinearLayout line = new LinearLayout(context);
line.setOrientation(LinearLayout.HORIZONTAL);
View colorLine = new View(context);
colorLine.setBackgroundColor(Color.argb(128, 255, 255, 255));
colorLine.setLayoutParams(new LinearLayout.LayoutParams(
ViewGroup.LayoutParams.WRAP_CONTENT,
2,
1.0f
));
line.addView(colorLine);
DisplayMetrics metrics = new DisplayMetrics();
((WindowManager) context.getSystemService(Context.WINDOW_SERVICE)).getDefaultDisplay().getMetrics(metrics);
line.setPadding(30, 10, 30, 10);
line.setLayoutParams(new LinearLayout.LayoutParams(
(int) (0.8 * metrics.widthPixels),
ViewGroup.LayoutParams.WRAP_CONTENT
));
linearLayout.addView(line);
LinearLayout container = new LinearLayout(context);
container.setOrientation(LinearLayout.HORIZONTAL);
TextView confirm = new TextView(context);
confirm.setText("确定");
confirm.setTextSize(20);
confirm.setTextColor(Color.parseColor("#03a9f4"));
confirm.setPadding(10, 10, 10, 10);
confirm.setGravity(Gravity.CENTER);
confirm.setLayoutParams(new LinearLayout.LayoutParams(
ViewGroup.LayoutParams.WRAP_CONTENT,
ViewGroup.LayoutParams.WRAP_CONTENT,
1.0f
));
confirm.setOnClickListener((event) -> {
XposedHelpers.setAdditionalInstanceField(intent, "ACCEPT", "");
context.startActivity(intent);
dismiss();
});
container.addView(confirm);
View view = new View(context);
view.setBackgroundColor(Color.argb(128, 255, 255, 255));
LinearLayout.LayoutParams params = new LinearLayout.LayoutParams(
2, ViewGroup.LayoutParams.MATCH_PARENT
);
params.setMargins(0, 0, 0, 10);
view.setLayoutParams(params);
container.addView(view);
TextView cancel = new TextView(context);
cancel.setText("不好");
cancel.setTextSize(20);
cancel.setTextColor(Color.parseColor("#ff0f0f"));
cancel.setPadding(10, 10, 10, 10);
cancel.setGravity(Gravity.CENTER);
cancel.setLayoutParams(new LinearLayout.LayoutParams(
ViewGroup.LayoutParams.WRAP_CONTENT,
ViewGroup.LayoutParams.WRAP_CONTENT,
1.0f
));
container.addView(cancel);
linearLayout.addView(container);
linearLayout.setLayoutParams(new LinearLayout.LayoutParams(
ViewGroup.LayoutParams.WRAP_CONTENT,
ViewGroup.LayoutParams.WRAP_CONTENT
));
linearLayout.setBackground(background);
frame.addView(linearLayout);
frame.setBackgroundColor(Color.argb(64, 0, 0,0));
frame.setLayoutParams(new FrameLayout.LayoutParams(
ViewGroup.LayoutParams.MATCH_PARENT,
ViewGroup.LayoutParams.MATCH_PARENT
));
frame.setOnClickListener((event) -> {
dismiss();
});
setContentView(frame);
}
public static String getNameByPackage(Context context, String packageName) {
PackageManager pm = context.getPackageManager();
try {
String name = pm.getApplicationLabel(pm.getApplicationInfo(packageName, PackageManager.GET_META_DATA)).toString();
if (name.equals("")) {
return "您的应用";
}
return "「" + name + "」";
} catch (PackageManager.NameNotFoundException err) {
return "您的应用";
}
}
}
|
在模块 MainActivity 测试插入控件成功后,继续 Hook 逻辑的编写。
补充挂钩逻辑
再次梳理一下挂钩逻辑:理论上这个钩子能够勾到应用发起的所有 Activity 切换行为,所以对于应用自身的活动,需要特判允许,对于指向其他包名的 Intent,则默认阻止,下面放上 IntentHook.java 的完整代码:
1
2
3
4
5
6
7
8
9
10
11
12
13
14
15
16
17
18
19
20
21
22
23
24
25
26
27
28
29
30
31
32
33
34
35
36
37
38
39
40
41
42
43
44
45
46
47
48
49
50
51
52
53
54
55
56
57
58
59
60
61
62
63
64
65
66
67
68
69
70
71
72
73
74
75
76
77
78
79
80
81
82
83
84
85
86
87
88
89
90
91
92
93
94
95
96
97
98
99
100
101
102
103
104
105
106
107
108
109
110
111
112
113
114
115
116
117
118
119
120
121
122
123
124
125
126
127
128
129
130
131
132
133
134
135
136
137
138
139
140
141
142
143
144
145
146
147
148
149
150
151
152
153
154
155
156
157
158
159
| package mufanc.edxp.kiwi;
import android.annotation.SuppressLint;
import android.app.Activity;
import android.app.Application;
import android.content.ComponentName;
import android.content.pm.PackageInfo;
import android.content.pm.PackageManager;
import android.content.res.AssetManager;
import android.content.res.Resources;
import android.graphics.drawable.Drawable;
import android.os.Bundle;
import android.util.Log;
import android.content.Intent;
import android.view.Gravity;
import android.view.View;
import androidx.core.content.res.ResourcesCompat;
import java.lang.reflect.Array;
import java.lang.reflect.Method;
import de.robv.android.xposed.IXposedHookLoadPackage;
import de.robv.android.xposed.IXposedHookZygoteInit;
import de.robv.android.xposed.XC_MethodHook;
import de.robv.android.xposed.XposedHelpers;
import de.robv.android.xposed.callbacks.XC_LoadPackage;
public class IntentHook implements IXposedHookZygoteInit, IXposedHookLoadPackage {
private static final String targetPackageName = "com.kiwibrowser.browser";
private static String modulePath;
private Drawable background = null;
@Override
public void initZygote(StartupParam startupParam) throws Throwable {
modulePath = startupParam.modulePath;
}
@Override
public void handleLoadPackage(XC_LoadPackage.LoadPackageParam lpparam) throws Throwable {
if (!lpparam.packageName.equals(targetPackageName)) {
return;
}
Log.i("KiwiLogcat", "Attaching: " + lpparam.processName);
final Activity[] activity = new Activity[1];
XposedHelpers.findAndHookMethod(
"android.app.Activity",
lpparam.classLoader,
"onCreate",
Bundle.class,
new XC_MethodHook() {
@Override
protected void afterHookedMethod(MethodHookParam param) throws Throwable {
Log.i("KiwiLogcat", "Launching:" + param.thisObject.getClass().getName());
activity[0] = (Activity) param.thisObject;
}
}
);
XposedHelpers.findAndHookMethod(
"android.app.Instrumentation",
lpparam.classLoader,
"callApplicationOnCreate",
Application.class,
new XC_MethodHook() {
@Override
protected void afterHookedMethod(MethodHookParam param) throws Throwable {
if (param.args[0] instanceof Application) {
loadResources((Application) param.args[0]);
}
}
}
);
XposedHelpers.findAndHookMethod(
"android.app.IActivityTaskManager$Stub$Proxy",
lpparam.classLoader,
"startActivity",
XposedHelpers.findClass("android.app.IApplicationThread", lpparam.classLoader),
String.class,
String.class,
Intent.class,
String.class,
android.os.IBinder.class,
String.class,
int.class,
int.class,
XposedHelpers.findClass("android.app.ProfilerInfo", lpparam.classLoader),
android.os.Bundle.class,
new XC_MethodHook() {
@Override
@SuppressLint("QueryPermissionsNeeded")
protected void beforeHookedMethod(MethodHookParam param) throws Throwable {
Intent intent = (Intent) param.args[3];
ComponentName componentName = intent.resolveActivity(activity[0].getPackageManager());
if (componentName != null && !componentName.getPackageName().equals(targetPackageName)) {
if (XposedHelpers.getAdditionalInstanceField(intent, "ACCEPT") == null) {
try {
PopupView popupView = new PopupView(activity[0], background, componentName.getPackageName(), intent);
View root = activity[0].getWindow().getDecorView().getRootView();
popupView.showAtLocation(root, Gravity.CENTER, 0, 0);
} catch (Exception err) {
Log.e("KiwiLogcat", "Error occurred while creating view:", err);
}
Log.i("KiwiLogcat", "Calling package: " + componentName.getPackageName());
Log.i("KiwiLogcat", "Intent: " + intent.toUri(0));
param.setResult(0);
} else {
Log.i("KiwiLogcat", "Accepted: " + intent.toString());
}
}
}
}
);
}
private void loadResources(Application application) {
if (background != null) {
return;
}
try {
@SuppressLint("PrivateApi")
Class<?> apkAssetsClass = Class.forName("android.content.res.ApkAssets");
Method loadFromPath = apkAssetsClass.getMethod("loadFromPath", String.class);
Object apkAssets = loadFromPath.invoke(null, modulePath);
AssetManager assets = AssetManager.class.newInstance();
Method setApkAssets = assets.getClass().getDeclaredMethod(
"setApkAssets",
Array.newInstance(apkAssetsClass, 0).getClass(),
boolean.class
);
Object assetsArray = Array.newInstance(apkAssetsClass, 1);
Array.set(assetsArray, 0, apkAssets);
setApkAssets.invoke(assets, assetsArray, false);
Resources resources = new Resources(
assets,
application.getResources().getDisplayMetrics(),
application.getResources().getConfiguration()
);
PackageInfo packageInfo = application.getPackageManager().getPackageArchiveInfo(modulePath, PackageManager.GET_ACTIVITIES);
Log.i("KiwiLogcat", "Loading resources from: " + packageInfo.packageName);
int floatyViewID = resources.getIdentifier("floaty_window", "layout", packageInfo.packageName);
int backgroundImageID = resources.getIdentifier("bilibili", "drawable", packageInfo.packageName);
background = ResourcesCompat.getDrawable(resources, backgroundImageID, null);
} catch (Exception err) {
Log.e("KiwiLogcat", "Error occurred while loading resources:", err);
}
}
}
|
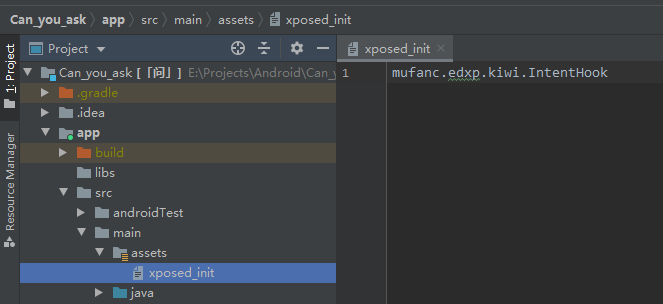
指定入口类
到现在工作还没有完全完成,最后需要向 Xposed 标明入口类,在 src/main/assets 目录下新建一个 xposed_init 文本文件,其中填写 Xposed 入口类名:
效果展示
编译安装后重启(开了「即时模块」则完全杀死 Kiwi 再重新打开),随便打开一个 Bilibili 视频链接,点击「用 APP 打开」,弹出询问对话框,

本模块代码将持续开源到 Github
注:这么烂的代码还好意思开?
待改进部分
- PopupWindow 弹出的时候没有动画,效果非常生硬;全屏对话框的效果也不是特别好(后期可能换成类似 Toast 的悬浮窗效果)
注:或许从 ActivityThread 中偷出当前 Activity 的实例,然后弹 dialog 会比较好实现
注:很明显,这是是调了 onResume 没调 onCreate
- 整个模块可以升级为系统级的「意图路由表」,配合常驻服务使用(?)